在我们之前关于 Selenium 的文章中,我们谈到了该软件提供的用于测试 Web 应用程序的工具。 在本文中,我们将回顾这些工具的安装以及可以使用以下工具运行的一些基本测试。
- 硒IDE
- 硒网格
- 硒网络驱动程序
我们将按照下面列出的顺序介绍每个 Selenium 工具。 所以让我们从安装 Selenium IDE 开始。 在此之后,我们将介绍每个工具的基本用法。
要求
服务器规格:
- CPU内核:2
- 内存:2 GB
- 操作系统:带有 GUI 的 Ubuntu 18.04 全新安装
硒IDE
要求: 由于 Selenium IDE 是 Chrome/Firefox 浏览器扩展,因此除了浏览器本身需要之外,它没有任何特殊的依赖项。 它可以在支持安装这些浏览器的任何操作系统上使用。
火狐安装
步骤 1. 首先,我们点击这里的链接来安装 Selenium 浏览器插件. 安装后,您的浏览器应如下所示。
第 2 步。之后,单击添加到 Firefox 按钮,将看到以下屏幕。
步骤 3. 点击添加。 如果一切顺利,应该安装扩展并准备使用。
步骤 4. 扩展程序第一次启动时,我们会看到以下屏幕提示。

我们将在下面继续上面提到的这个过程 部分.
Chrome CLI 安装
可以通过命令行使用以下命令在 Ubuntu 18.04 上安装 Chrome。
第 1 步:获取最新稳定版本的包:
[email protected]:~$ wget https://dl.google.com/linux/direct/google-chrome-stable_current_amd64.deb --2019-12-28 21:07:45-- https://dl.google.com/linux/direct/google-chrome-stable_current_amd64.deb Resolving dl.google.com (dl.google.com)... 216.58.211.14, 2a00:1450:400f:80d::200e Connecting to dl.google.com (dl.google.com)|216.58.211.14|:443... connected. HTTP request sent, awaiting response... 200 OK Length: 62181264 (59M) [application/x-debian-package] Saving to: 'google-chrome-stable_current_amd64.deb' google-chrome-stable_current_amd64.deb 100%[=============================================>] 59.30M 2.86MB/s in 21s 2019-12-28 21:08:07 (2.78 MB/s) - 'google-chrome-stable_current_amd64.deb' saved [62181264/62181264]第 2 步:使用以下命令安装它:
[email protected]:~$ sudo dpkg -i google-chrome-stable_current_amd64.deb Selecting previously unselected package google-chrome-stable. (Reading database ... 129294 files and directories currently installed.) Preparing to unpack google-chrome-stable_current_amd64.deb ... Unpacking google-chrome-stable (79.0.3945.88-1) ... Setting up google-chrome-stable (79.0.3945.88-1) ... update-alternatives: using /usr/bin/google-chrome-stable to provide /usr/bin/x-www-browser (x-www-browser) in auto mode update-alternatives: using /usr/bin/google-chrome-stable to provide /usr/bin/gnome-www-browser (gnome-www-browser) in auto mode update-alternatives: using /usr/bin/google-chrome-stable to provide /usr/bin/google-chrome (google-chrome) in auto mode Processing triggers for gnome-menus (3.13.3-11ubuntu1.1) ... Processing triggers for desktop-file-utils (0.23-1ubuntu3.18.04.2) ... Processing triggers for mime-support (3.60ubuntu1) ... Processing triggers for man-db (2.8.3-2ubuntu0.1) ...如果一切顺利,您应该会在 Show Applications 中看到 Chrome。

在 Chrome 上安装 Selenium IDE
Chrome 中扩展的安装与 Firefox 中的相同。 这 Chrome 的硒扩展 可以在那里找到(这里是 Selenium Firefox 扩展)。
第 1 步:单击“添加到 Chrome”按钮。

步骤 2. 点击添加扩展。

应该是这样! 如果一切顺利并且没有显示错误,那么扩展现在应该可以在 Chrome 中使用了。
Selenium IDE 使用
我们将在 Firefox 上使用扩展来演示进一步的任务。
步骤 1. 首先,我们需要创建一个项目。 我们将单击“创建新项目”开始。
第 2 步。一旦我们创建了一个新项目,我们需要给它一个名字。 我们将使用 SeleniumLW 作为我们的项目名称。

步骤 3. 为项目指定名称后,单击“确定”,将显示“项目”页面。

在右上角,应该有一个 REC 按钮。 当我们按下 Record 时,将弹出以下屏幕。 (我们将在 https://CodePre.com 上运行测试作为测试)。

第 5 步。 一旦我们按下开始录制,它将在新窗口中打开链接,在网站上采取的任何操作都将被记录下来,并在以下屏幕上列出。

步骤 6. 在该屏幕下方是我们可以看到从测试期间运行的命令中提取的各种信息的位置。 停止录制后,我们可以运行测试,该测试将复制我们之前在站点上执行的所有任务。 如果在扩展的“日志”部分中发现任何问题,它将记录日志。

步骤 7. 下一个选项卡称为参考。 在此页面上,我们可以看到测试期间记录的每个命令的描述。 Selenium IDE 不仅用于可视化测试,还用于创建测试原型。 这是因为它能够将这些测试导出到 WebDriver 应用程序。 保存测试后,我们可以通过右键单击并选择“导出”选项来导出测试。 可以在每个命令或每个项目的基础上完成导出。 这将引导我们在导出选项期间使用一些其他选项。

第 8 步。接下来,我们将输出导出到 Python(或您更熟悉的任何语言)。 保存输出后,WebDriver 中的 Python 测试输出将如下所示:
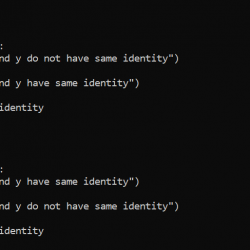
# Generated by Selenium IDE import pytest import time import json from selenium import webdriver from selenium.webdriver.common.by import By from selenium.webdriver.common.action_chains import ActionChains from selenium.webdriver.support import expected_conditions from selenium.webdriver.support.wait import WebDriverWait from selenium.webdriver.common.keys import Keys from selenium.webdriver.common.desired_capabilities import DesiredCapabilities class TestTestLW(): def setup_method(self, method): self.driver = webdriver.Firefox() self.vars = {} def teardown_method(self, method): self.driver.quit() def test_testLW(self): # Test name: TestLW # Step # | name | target | value | comment # 1 | open "https://www.CodePre.com/" | self.driver.get("https://www.CodePre.com/") # 2 | setWindowSize | 1853x920 | | self.driver.set_window_size(1853, 920) # 3 | click | css=.menu-item-has-children:nth-child(1) > a | | self.driver.find_element(By.CSS_SELECTOR, ".menu-item-has-children:nth-child(1) > a").click() # 4 | click | css=.sub-nav-wrap:nth-child(1) .menu-item:nth-child(5) span | | self.driver.find_element(By.CSS_SELECTOR, ".sub-nav-wrap:nth-child(1) .menu-item:nth-child(5) span").click() # 5 | runScript | window.scrollTo(0,191) | | self.driver.execute_script("window.scrollTo(0,191)") # 6 | runScript | window.scrollTo(0,399) | | self.driver.execute_script("window.scrollTo(0,399)") # 7 | runScript | window.scrollTo(0,741) | | self.driver.execute_script("window.scrollTo(0,741)") # 8 | runScript | window.scrollTo(0,1311) | | self.driver.execute_script("window.scrollTo(0,1311)") # 9 | runScript | window.scrollTo(0,1968) | | self.driver.execute_script("window.scrollTo(0,1968)") # 10 | click | css=#fl-accordion-5c2d26f14835f-tab-49 > .fl-accordion-button-label | | self.driver.find_element(By.CSS_SELECTOR, "#fl-accordion-5c2d26f14835f-tab-49 > .fl-accordion-button-label").click()正如我们在上一篇文章中提到的,Selenium IDE 在各种情况下都非常出色,但它确实缺乏一些选项和配置,这就是它主要用于原型设计的原因。
安装硒网格
Selenium Grid 使我们能够同时在多个浏览器和环境上运行测试。 这大大减少了测试所需的时间。
安装依赖项
步骤 1. 首先,我们将安装 software-properties-common 以方便添加更多存储库。
[email protected]:~$ sudo apt-get install software-properties-common Reading package lists... Done Building dependency tree Reading state information... Done software-properties-common is already the newest version (0.96.24.32.11). 0 upgraded, 0 newly installed, 0 to remove and 0 not upgraded.第 2 步。接下来,让我们使用以下命令更新我们的存储库:
[email protected]:~$ sudo apt-get update Hit:1 https://ppa.launchpad.net/webupd8team/java/ubuntu bionic InRelease Hit:2 https://archive.ubuntu.com/ubuntu bionic InRelease Hit:3 https://archive.ubuntu.com/ubuntu bionic-updates InRelease Hit:4 https://archive.ubuntu.com/ubuntu bionic-backports InRelease Hit:5 https://security.ubuntu.com/ubuntu bionic-security InRelease Ign:6 https://dl.google.com/linux/chrome/deb stable InRelease Hit:7 https://dl.google.com/linux/chrome/deb stable Release Reading package lists... Done第 3 步。接下来,我们将使用以下命令安装 Java JDK 8:
sudo apt 安装默认 jre
[email protected]:~$ sudo apt install default-jre Reading package lists... Done Building dependency tree Reading state information... Done The following additional packages will be installed: ca-certificates-java default-jre-headless fonts-dejavu-extra java-common libatk-wrapper-java libatk-wrapper-java-jni libgif7 openjdk-11-jre openjdk-11-jre-headless Suggested packages: fonts-ipafont-gothic fonts-ipafont-mincho fonts-wqy-microhei | fonts-wqy-zenhei The following NEW packages will be installed: ca-certificates-java default-jre default-jre-headless fonts-dejavu-extra java-common libatk-wrapper-java libatk-wrapper-java-jni libgif7 openjdk-11-jre openjdk-11-jre-headless 0 upgraded, 10 newly installed, 0 to remove and 223 not upgraded. Need to get 39.6 MB of archives. After this operation, 179 MB of additional disk space will be used. Do you want to continue? [Y/n] y … … … … Setting up default-jre (2:1.11-68ubuntu1~18.04.1) ... Processing triggers for libc-bin (2.27-3ubuntu1) ... Processing triggers for man-db (2.8.3-2ubuntu0.1) ... Processing triggers for gnome-menus (3.13.3-11ubuntu1.1) ... Processing triggers for ca-certificates (20180409) ... Updating certificates in /etc/ssl/certs... 0 added, 0 removed; done. Running hooks in /etc/ca-certificates/update.d... done. done. Processing triggers for hicolor-icon-theme (0.17-2) ... Processing triggers for fontconfig (2.12.6-0ubuntu2) ... Processing triggers for mime-support (3.60ubuntu1) ... Processing triggers for desktop-file-utils (0.23-1ubuntu3.18.04.2) … [email protected]:~$ Step 4. 如果一切顺利,没有出现错误,我们可以使用以下命令检查Java版本。
[email protected]:~$ java -version openjdk version "11.0.5" 2019-10-15 OpenJDK Runtime Environment (build 11.0.5+10-post-Ubuntu-0ubuntu1.118.04) OpenJDK 64-Bit Server VM (build 11.0.5+10-post-Ubuntu-0ubuntu1.118.04, mixed mode, sharing)安装硒网格
步骤 5. 接下来,我们将下载 Selenium 发布 jar 文件。
[email protected]:~$ wget https://selenium-release.storage.googleapis.com/3.10/selenium-server-standalone-3.10.0.jar --2019-12-28 22:51:56-- https://selenium-release.storage.googleapis.com/3.10/selenium-server-standalone-3.10.0.jar Resolving selenium-release.storage.googleapis.com (selenium-release.storage.googleapis.com)... 172.217.22.176, 2a00:1450:400f:80b::2010 Connecting to selenium-release.storage.googleapis.com (selenium-release.storage.googleapis.com)|172.217.22.176|:80... connected. HTTP request sent, awaiting response... 200 OK Length: 23427664 (22M) [application/java-archive] Saving to: 'selenium-server-standalone-3.10.0.jar' selenium-server-standalone-3.10.0.jar 100%[===========================================>] 22.34M 3.94MB/s in 5.5s 2019-12-28 22:52:02 (4.03 MB/s) - 'selenium-server-standalone-3.10.0.jar' saved [23427664/23427664]启动硒网格
步骤 6. 现在我们可以使用 java 命令启动 Selenium。
[email protected]:~$ java -jar selenium-server-standalone-3.10.0.jar -role hub 22:54:44.323 INFO [GridLauncherV3.launch] - Selenium build info: version: '3.10.0', revision: '176b4a9' 22:54:44.377 INFO [GridLauncherV3$2.launch] - Launching Selenium Grid hub on port 4444 2019-12-28 22:54:45.881:INFO::main: Logging initialized @2350ms to org.seleniumhq.jetty9.util.log.StdErrLog 22:54:46.200 INFO [Hub.start] - Selenium Grid hub is up and running 22:54:46.204 INFO [Hub.start] - Nodes should register to https://10.0.2.15:4444/grid/register/ 22:54:46.205 INFO [Hub.start] - Clients should connect to https://10.0.2.15:4444/wd/hub步骤 7. 现在我们已经启动了集线器,我们可以在它们各自的机器中配置节点。 为此,我们将使用以下设置创建一个名为 config.json 的文件。
{ "capabilities": [ { "browserName": "firefox", "marionette": true, "maxInstances": 5, "seleniumProtocol": "WebDriver", "version": "58.0.2" } ], "proxy": "org.openqa.grid.selenium.proxy.DefaultRemoteProxy", "maxSession": 5, "port": 5555, "register": true, "registerCycle": 5000, "hub": "https://10.0.2.15:4444", "nodeStatusCheckTimeout": 5000, "nodePolling": 5000, "role": "node", "unregisterIfStillDownAfter": 60000, "downPollingLimit": 2, "debug": false, "servlets" : [], "withoutServlets": [], "custom": {} }步骤 8. 现在我们可以通过键入以下命令来启动节点:
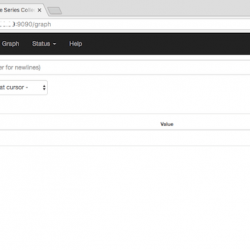
[email protected]:~$ java -jar selenium-server-standalone-3.10.0.jar -role node -nodeConfig config.json 23:05:21.922 INFO [GridLauncherV3.launch] - Selenium build info: version: '3.10.0', revision: '176b4a9' 23:05:21.935 INFO [GridLauncherV3$3.launch] - Launching a Selenium Grid node on port 5555 2019-12-28 23:05:22.387:INFO::main: Logging initialized @1264ms to org.seleniumhq.jetty9.util.log.StdErrLog 23:05:22.728 INFO [SeleniumServer.boot] - Selenium Server is up and running on port 5555 23:05:22.729 INFO [GridLauncherV3$3.launch] - Selenium Grid node is up and ready to register to the hub 23:05:22.747 INFO [SelfRegisteringRemote$1.run] - Starting auto registration thread. Will try to register every 5000 ms. 23:05:22.767 INFO [SelfRegisteringRemote.registerToHub] - Registering the node to the hub: https://10.0.2.15:4444/grid/register 23:05:23.853 INFO [SelfRegisteringRemote.registerToHub] - Updating the node configuration from the hub 23:05:24.012 INFO [SelfRegisteringRemote.registerToHub] - The node is registered to the hub and ready to use由于我们已经配置了集线器和节点,我们应该可以通过以下链接看到它们:https://10.0.2.15:4444/grid/console

如需进一步阅读,您可以查看许多其他 硒网格选项 可以配置。
安装 Selenium WebDriver (ChromeDriver)
Step 1. 由于我们已经安装了 selenium-server-standalone 框架,所以不需要再次重复这些步骤。 我们只需要为 Chrome 安装一个新的驱动程序。 首先,我们需要安装一些依赖项。
[email protected]:~$ sudo apt-get install -y unzip xvfb libxi6 libgconf-2-4 Reading package lists... Done Building dependency tree Reading state information... Done libxi6 is already the newest version (2:1.7.9-1). unzip is already the newest version (6.0-21ubuntu1). The following additional packages will be installed: gconf-service gconf-service-backend gconf2-common The following NEW packages will be installed: gconf-service gconf-service-backend gconf2-common libgconf-2-4 xvfb 0 upgraded, 5 newly installed, 0 to remove and 223 not upgraded. Need to get 1,628 kB of archives. After this operation, 10.3 MB of additional disk space will be used. Get:1 https://archive.ubuntu.com/ubuntu bionic/universe amd64 gconf2-common all 3.2.6-4ubuntu1 [700 kB] Get:2 https://archive.ubuntu.com/ubuntu bionic/universe amd64 libgconf-2-4 amd64 3.2.6-4ubuntu1 [84.8 kB] Get:3 https://archive.ubuntu.com/ubuntu bionic/universe amd64 gconf-service-backend amd64 3.2.6-4ubuntu1 [58.1 kB] Get:4 https://archive.ubuntu.com/ubuntu bionic/universe amd64 gconf-service amd64 3.2.6-4ubuntu1 [2,036 B] Get:5 https://archive.ubuntu.com/ubuntu bionic-updates/universe amd64 xvfb amd64 2:1.19.6-1ubuntu4.3 [783 kB] Fetched 1,628 kB in 2s (981 kB/s) Selecting previously unselected package gconf2-common. (Reading database ... 129820 files and directories currently installed.) Preparing to unpack .../gconf2-common_3.2.6-4ubuntu1_all.deb ... Unpacking gconf2-common (3.2.6-4ubuntu1) ... Selecting previously unselected package libgconf-2-4:amd64. Preparing to unpack .../libgconf-2-4_3.2.6-4ubuntu1_amd64.deb ... Unpacking libgconf-2-4:amd64 (3.2.6-4ubuntu1) ... Selecting previously unselected package gconf-service-backend. Preparing to unpack .../gconf-service-backend_3.2.6-4ubuntu1_amd64.deb ... Unpacking gconf-service-backend (3.2.6-4ubuntu1) ... Selecting previously unselected package gconf-service. Preparing to unpack .../gconf-service_3.2.6-4ubuntu1_amd64.deb ... Unpacking gconf-service (3.2.6-4ubuntu1) ... Selecting previously unselected package xvfb. Preparing to unpack .../xvfb_2%3a1.19.6-1ubuntu4.3_amd64.deb ... Unpacking xvfb (2:1.19.6-1ubuntu4.3) ... Setting up gconf2-common (3.2.6-4ubuntu1) ... Creating config file /etc/gconf/2/path with new version Setting up xvfb (2:1.19.6-1ubuntu4.3) ... Setting up libgconf-2-4:amd64 (3.2.6-4ubuntu1) ... Setting up gconf-service-backend (3.2.6-4ubuntu1) ... Setting up gconf-service (3.2.6-4ubuntu1) ... Processing triggers for libc-bin (2.27-3ubuntu1) ... Processing triggers for man-db (2.8.3-2ubuntu0.1) ...步骤 2. 下载 ChromeDriver
[email protected]:~$ wget https://chromedriver.storage.googleapis.com/2.41/chromedriver_linux64.zip --2019-12-28 23:24:32-- https://chromedriver.storage.googleapis.com/2.41/chromedriver_linux64.zip Resolving chromedriver.storage.googleapis.com (chromedriver.storage.googleapis.com)... 216.58.211.144, 2a00:1450:400f:80c::2010 Connecting to chromedriver.storage.googleapis.com (chromedriver.storage.googleapis.com)|216.58.211.144|:443... connected. HTTP request sent, awaiting response... 200 OK Length: 3944714 (3.8M) [application/zip] Saving to: 'chromedriver_linux64.zip' chromedriver_linux64.zip 100%[===========================================>] 3.76M 3.69MB/s in 1.0s 2019-12-28 23:24:34 (3.69 MB/s) - 'chromedriver_linux64.zip' saved [3944714/3944714]第 3 步。接下来,我们解压缩下载的 ChromeDriver 文件。
[email protected]:~$ unzip chromedriver_linux64.zip Archive: chromedriver_linux64.zip inflating: chromedriverStep 4. 我们将依次运行以下命令来准备好ChromeDriver 以供使用。 让我们将解压后的 chromedriver 文件移动到 /usr/bin/ 文件夹。 然后,我们确保 root 用户拥有它。 之后,我们使用 chmod 命令添加执行权限标志,最后,我们验证版本。
[email protected]:~$ sudo mv chromedriver /usr/bin/chromedriver [email protected]:~$ sudo chown root:root /usr/bin/chromedriver [email protected]:~$ sudo chmod +x /usr/bin/chromedriver [email protected]:~$ chromedriver --version ChromeDriver 2.41.578700 (2f1ed5f9343c13f73144538f15c00b370eda6706)第 5 步。接下来,我们使用此命令通过 Selenium 服务器运行 ChromeDriver。
[email protected]:~$ xvfb-run java -Dwebdriver.chrome.driver=/usr/bin/chromedriver -jar selenium-server-standalone-3.10.0.jar 23:32:09.057 INFO [GridLauncherV3.launch] - Selenium build info: version: '3.10.0', revision: '176b4a9' 23:32:09.062 INFO [GridLauncherV3$1.launch] - Launching a standalone Selenium Server on port 4444 2019-12-28 23:32:10.051:INFO::main: Logging initialized @1951ms to org.seleniumhq.jetty9.util.log.StdErrLog 23:32:10.687 INFO [SeleniumServer.boot] - Selenium Server is up and running on port 4444基本上,WebDriver 只是网络浏览器的参考,所以我们已经展示了如何在网格的初始设置中使用 ChromeDriver 和 FirefoxDrive 安装 Selenium。
硒RC
Selenium Remote Control (RC) 已被弃用,取而代之的是 Selenium WebDriver。 在大多数情况下,测试人员现在主要使用 Selenium Grid 和 WebDriver 以获得更快的结果。 因此,我们不会在本教程中介绍 Selenium 的这一部分。
综上所述
Selenium 是一组强大的测试工具,组合在一个套件中。 使用它的测试人员在很大程度上比在广泛的环境中手动运行测试更有效率。 此外,如果在多个系统的不同浏览器上测试大量 Web 应用程序,Selenium 非常有用。
就像你看到的那样?
给我们打电话 800.580.4985,或打开一个 聊天 或与我们联系,与我们知识渊博的解决方案或经验丰富的托管顾问之一交谈,以了解您今天如何利用这种技术知识!